
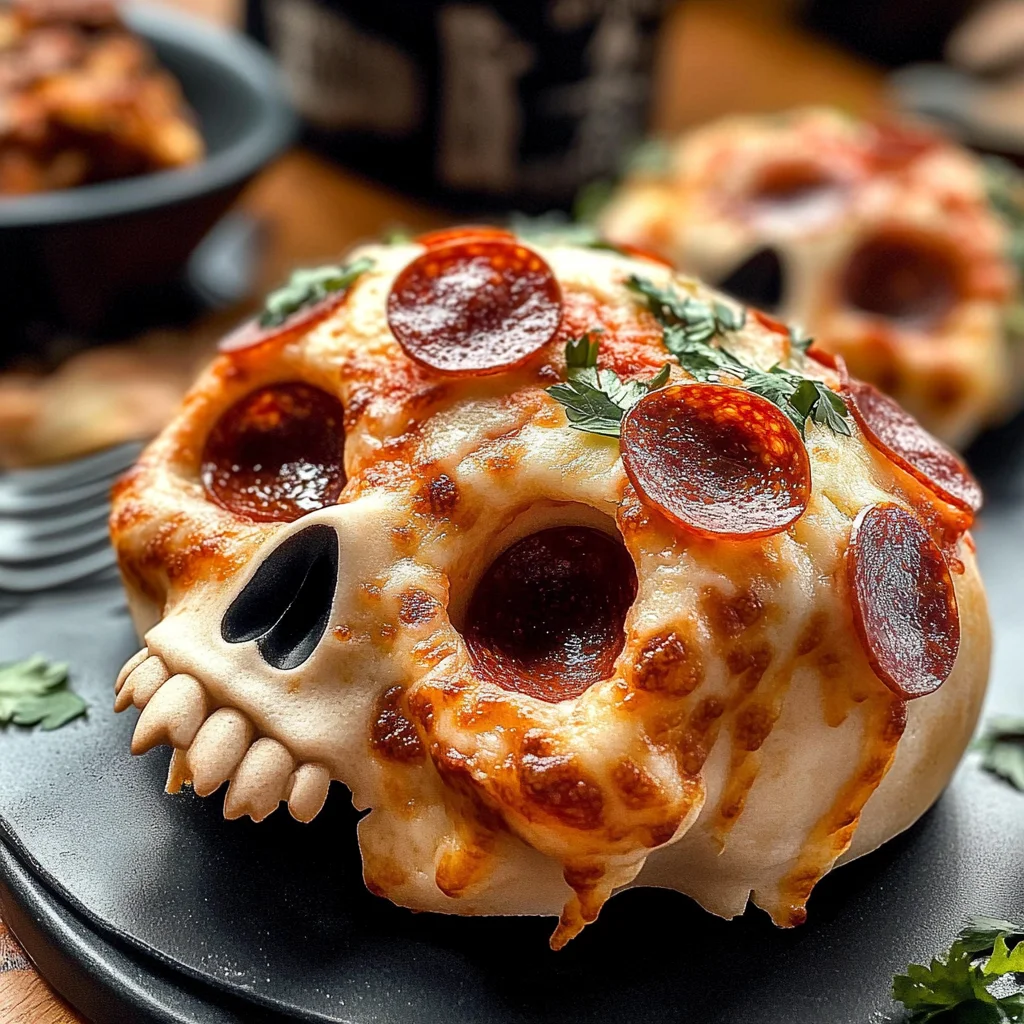
These Cheesy Halloween Pizza Skulls are a fun and delicious way to celebrate the spooky season. Perfect for Halloween parties, kid-friendly dinners, or cozy fall evenings, these pizza skulls offer a unique twist on traditional pizza. With customizable fillings and a fun skull shape, they are sure to be a hit with both kids and adults alike.
Why You’ll Love This Recipe
- Easy to Make: With pre-made dough, this recipe simplifies the pizza-making process, making it accessible for everyone.
- Customizable Fillings: You can mix and match your favorite toppings to create a unique flavor combination for each skull.
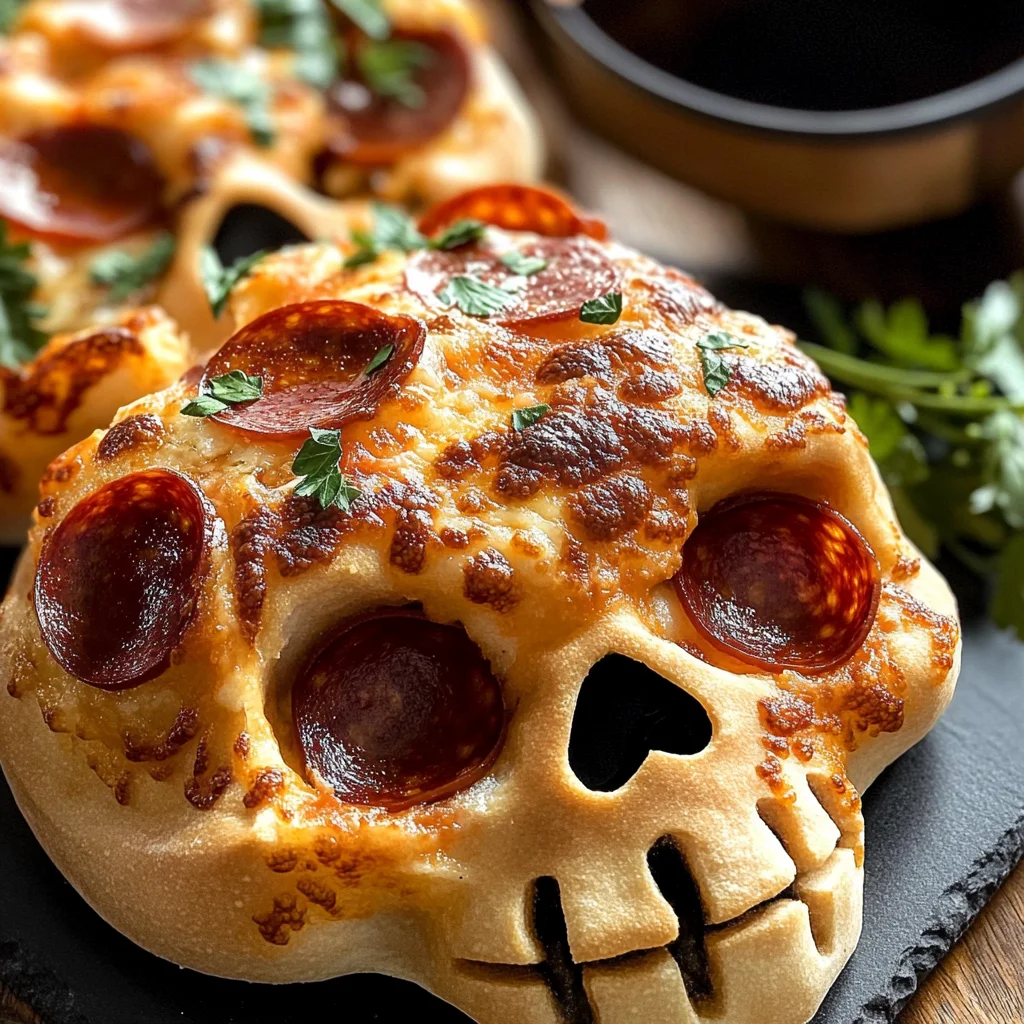
- Fun Presentation: The skull shape makes these pizzas visually appealing and perfect for Halloween gatherings.
- Great for Parties: Serve them at your next Halloween party or casual get-together, and watch them disappear!
- Kid-Friendly: Kids will love helping make these cheesy treats, making it a fun family activity.
Tools and Preparation
For this recipe, you’ll need some essential tools. Having the right equipment makes the cooking process smoother and more enjoyable.
Essential Tools and Equipment
- Mini skull baking tin
- Rolling pin
- Cooking spray
- Knife or pizza cutter
Importance of Each Tool
- Mini skull baking tin: This is crucial for achieving the perfect skull shape for your pizzas.
- Rolling pin: It helps in evenly rolling out the dough to the right thickness, ensuring even cooking.
- Cooking spray: Prevents sticking and makes it easier to remove the finished pizzas from the tin.
Ingredients
For the Dough
- 13 to 16 ounces of pre-made pizza dough
For the Sauce
- 3/4 to 1 cup pizza sauce
For the Cheese
- 2 cups shredded mozzarella
- Parmesan cheese (about 1/4 cup)
For the Toppings
- Cooked sausage (about 8 ounces for 6 pizza skulls)
- Mini pepperoni (about 6 ounces for 6 pizza skulls)
- Black olives (sliced)
- Sliced chicken ham (chopped)
- Crumble crispy turkey bacon
- Mini Italian meatballs
- Cooked corn kernels
- Baby spinach
- Fresh basil
For Serving
- Marinara sauce for dipping
- Chopped parsley or basil
How to Make Cheesy Halloween Pizza Skulls
Step 1: Prepare Your Baking Tin
Spray the mini skull baking tin with cooking spray to prevent sticking.
Step 2: Roll Out the Dough
Dust your counter lightly with flour. Roll, pat, or stretch the dough until it’s roughly 1/4 thick. Cut it into 6 rectangles; don’t worry about perfection!
Step 3: Fill Each Skull
Take one piece of dough at a time and lay it into a skull cavity. Fill with:
1. Pizza sauce
2. Shredded mozzarella
3. A sprinkle of Parmesan cheese
4. Your chosen toppings
After adding toppings, drizzle a small amount of pizza sauce on top before sealing.
Step 4: Seal the Dough
Fold over the dough to cover fillings, pinching it shut like a small pizza pocket. Repeat until all pieces are filled and sealed.
Step 5: Chill Before Baking
Refrigerate your filled tray while you preheat your oven.
Step 6: Preheat Oven
Preheat your oven to 400 degrees Fahrenheit.
Step 7: Bake Your Skull Pizzas
Remove from refrigeration and bake for 16 to 20 minutes or until they are lightly golden brown. Keep an eye on them as baking times may vary depending on dough brand.
Step 8: Cool and Serve
Once baked, allow them to cool for about 5 minutes before unmolding. Serve warm with marinara sauce and garnish with chopped parsley or basil if desired. Enjoy your Cheesy Halloween Pizza Skulls!
How to Serve Cheesy Halloween Pizza Skulls
These Cheesy Halloween Pizza Skulls are not just a treat; they also make for a fun and festive presentation. Here are some creative serving suggestions to elevate your spooky dining experience.
Individual Skull Plates
- Serve each pizza skull on a separate plate decorated with Halloween-themed designs for a personal touch.
Platter of Dipping Sauces
- Accompany the pizza skulls with a variety of dipping sauces like marinara, ranch, or garlic butter for added flavor.
Halloween-Themed Garnishes
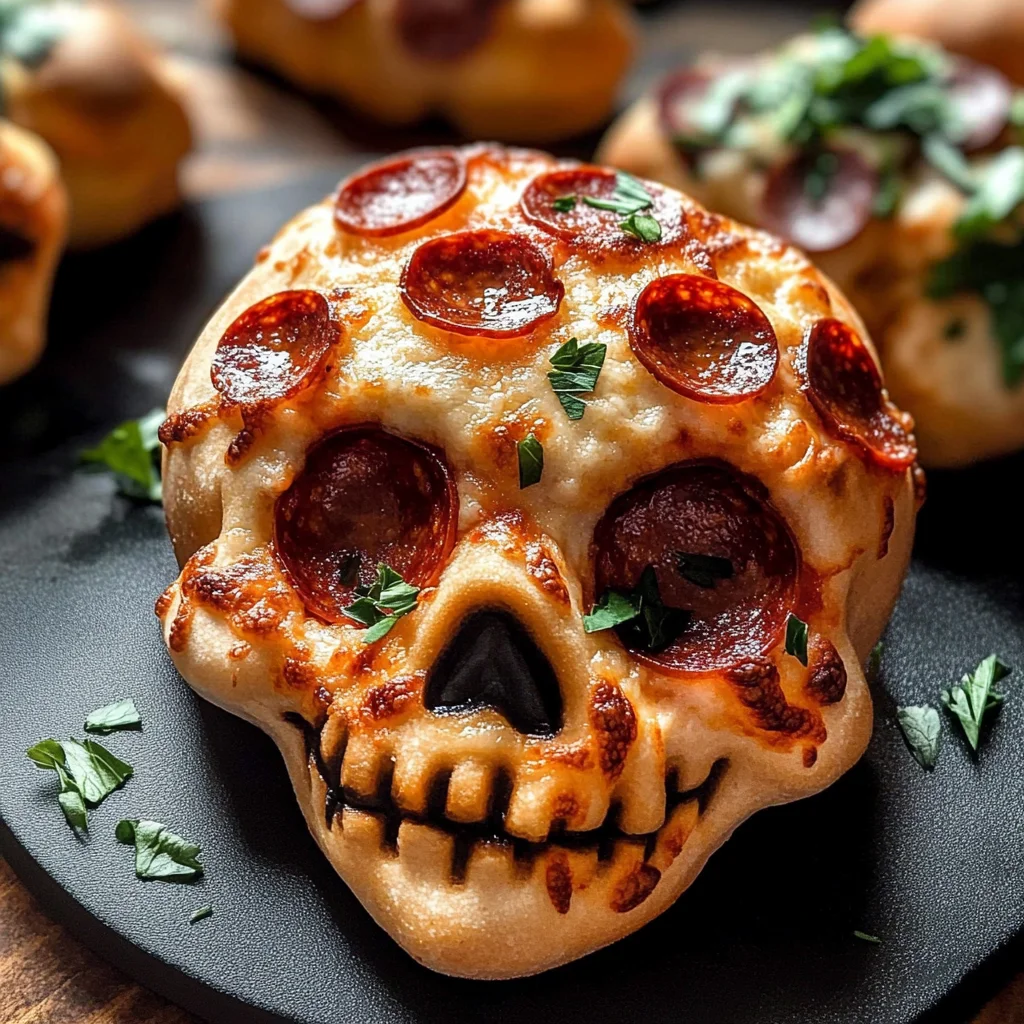
- Use fresh basil or parsley to create a graveyard effect around the pizza skulls, enhancing their visual appeal.
Spooky Drink Pairings
- Offer themed beverages such as witches’ brew lemonade or dark-colored sodas to complement the meal and delight your guests.
Side Salad with a Twist
- Add a side salad topped with candy corn or edible flowers to keep up with the festive spirit while providing some freshness.
Decorated Serving Tray
- Present the pizza skulls on a tray adorned with Halloween decorations like fake spider webs or mini pumpkins for an eye-catching display.
How to Perfect Cheesy Halloween Pizza Skulls
Creating perfect Cheesy Halloween Pizza Skulls is all about attention to detail. Follow these tips for the best results.
- Use fresh ingredients: Fresh mozzarella and quality toppings will enhance the flavor and texture of your pizza skulls.
- Seal properly: Ensure that you pinch the dough tightly around the fillings to prevent any leaks during baking.
- Experiment with fillings: Feel free to customize your pizza skulls with different meats, vegetables, or even cheeses for unique flavors.
- Bake until golden: Keep an eye on them in the oven; they should be golden brown but not overbaked, which can dry them out.
- Let cool before serving: Allowing them to cool for a few minutes will help maintain their shape when unmolding.
- Garnish creatively: Adding garnishes like chopped parsley or basil not only looks great but also adds freshness to each bite.
Best Side Dishes for Cheesy Halloween Pizza Skulls
Pairing your Cheesy Halloween Pizza Skulls with complementary side dishes can make your meal even more enjoyable. Here are some great options:
-
Crispy Garlic Bread
A classic favorite that pairs perfectly with cheesy flavors. Dip it in marinara sauce for extra enjoyment. -
Pumpkin Soup
This creamy soup adds seasonal flair and warmth, making it a cozy companion for your pizza skulls. -
Roasted Vegetables
A colorful medley of roasted vegetables provides a nutritious balance and enhances the overall meal presentation. -
Fruit Salad
A refreshing fruit salad can cleanse the palate between bites of savory pizza skulls, adding a sweet touch. -
Caesar Salad
The crisp romaine lettuce and tangy dressing offer a refreshing contrast to the richness of the pizza skulls. -
Cheesy Nachos
These crunchy nachos topped with melted cheese and jalapeños create a fun finger-food option that complements the meal well. -
Stuffed Mini Peppers
These bite-sized delights filled with cheese and spices add color and flavor while keeping the health quotient high. -
Spooky Veggie Platter
Arrange assorted veggies in creative shapes along with hummus or ranch dip for a fun and healthy snack option.
Common Mistakes to Avoid
When making Cheesy Halloween Pizza Skulls, it’s easy to make a few common mistakes. Here are some pitfalls to avoid for the best results.
- Skipping Dough Preparation: Not properly preparing your dough can lead to sticking. Always dust your work surface with flour to prevent this issue.
- Overfilling the Skulls: Adding too many toppings can cause the dough to break during baking. Stick to a balanced amount of sauce and toppings for a perfect seal.
- Not Sealing Properly: If you don’t pinch the dough tightly, your fillings may leak out while baking. Make sure the edges are well sealed before baking.
- Ignoring Cooking Time: Different doughs may require different baking times. Keep an eye on them and adjust as necessary to avoid undercooking or burning.
- Neglecting Cooling Time: Trying to unmold the skulls too soon can result in breakage. Allow them to cool for a few minutes after baking for better results.
Storage & Reheating Instructions
Refrigerator Storage
- Store leftover Cheesy Halloween Pizza Skulls in an airtight container in the fridge.
- They will keep well for up to 3 days.
Freezing Cheesy Halloween Pizza Skulls
- Wrap each skull individually in plastic wrap and place them in a freezer bag.
- These can be frozen for up to 2 months.
Reheating Cheesy Halloween Pizza Skulls
- Oven: Preheat your oven to 350°F (175°C) and bake for about 10-15 minutes until heated through.
- Microwave: Place on a microwave-safe plate and heat for 30-60 seconds until warm.
- Stovetop: Heat in a skillet over low heat, covering with a lid for even warming.
Frequently Asked Questions
What are Cheesy Halloween Pizza Skulls?
Cheesy Halloween Pizza Skulls are savory treats made with pizza dough filled with cheese, sauce, and various toppings, shaped like skulls for a fun Halloween twist.
Can I customize my Cheesy Halloween Pizza Skulls?
Absolutely! You can use any toppings you prefer, such as vegetables or different types of meat, making them versatile for everyone’s tastes.
Are Cheesy Halloween Pizza Skulls kid-friendly?
Yes! These pizza skulls are perfect for kids and make great snacks or meals during Halloween festivities.
How do I serve Cheesy Halloween Pizza Skulls?
Serve these delightful pizza skulls warm with marinara sauce on the side for dipping. They make fantastic appetizers at parties!
Final Thoughts
Cheesy Halloween Pizza Skulls are not only fun but also incredibly versatile. You can easily customize them with your favorite ingredients, making them suitable for every palate. Try making these spooky treats at your next gathering or simply enjoy them as a festive meal during the holiday season!

Cheesy Halloween Pizza Skulls
- Total Time: 40 minutes
- Yield: Makes approximately 6 servings 1x
Description
Cheesy Halloween Pizza Skulls are the perfect spooky treat for your Halloween gatherings! These adorable skull-shaped pizzas are filled with gooey cheese, savory toppings, and a delicious pizza sauce, making them an irresistible delight for both kids and adults. They offer a fun twist on traditional pizza, allowing you to customize fillings according to your taste preferences. Whether you’re hosting a Halloween party or enjoying a cozy dinner at home, these cheesy creations will be the star of the show. Serve them warm with marinara sauce for dipping, and watch as they disappear from the plate!
Ingredients
- 13 to 16 ounces pre-made pizza dough
- 3/4 to 1 cup pizza sauce
- 2 cups shredded mozzarella cheese
- 1/4 cup Parmesan cheese
- Assorted toppings (cooked sausage, mini pepperoni, black olives, chicken ham, turkey bacon, mini meatballs, corn kernels, baby spinach)
Instructions
- Preheat your oven to 400°F (200°C) and prepare a mini skull baking tin by spraying it with cooking spray.
- Roll out the pizza dough on a floured surface to about 1/4 inch thick. Cut into rectangles suitable for the skull cavities.
- Place each dough piece into the skull tin and fill with pizza sauce, mozzarella, Parmesan, and your chosen toppings.
- Fold over the dough to seal each skull tightly.
- Chill in the refrigerator while the oven heats.
- Bake for 16-20 minutes or until golden brown.
- Allow cooling for 5 minutes before unmolding. Serve warm with marinara sauce.
- Prep Time: 20 minutes
- Cook Time: 20 minutes
- Category: Dinner
- Method: Baking
- Cuisine: American
Nutrition
- Serving Size: 1 Cheesy Halloween Pizza Skull (85g)
- Calories: 250
- Sugar: 3g
- Sodium: 520mg
- Fat: 12g
- Saturated Fat: 5g
- Unsaturated Fat: 6g
- Trans Fat: 0g
- Carbohydrates: 25g
- Fiber: 2g
- Protein: 10g
- Cholesterol: 25mg
Keywords: Feel free to experiment with different toppings like vegetables or various cheeses for unique flavors. Make sure to pinch the dough tightly to avoid leaks during baking.