
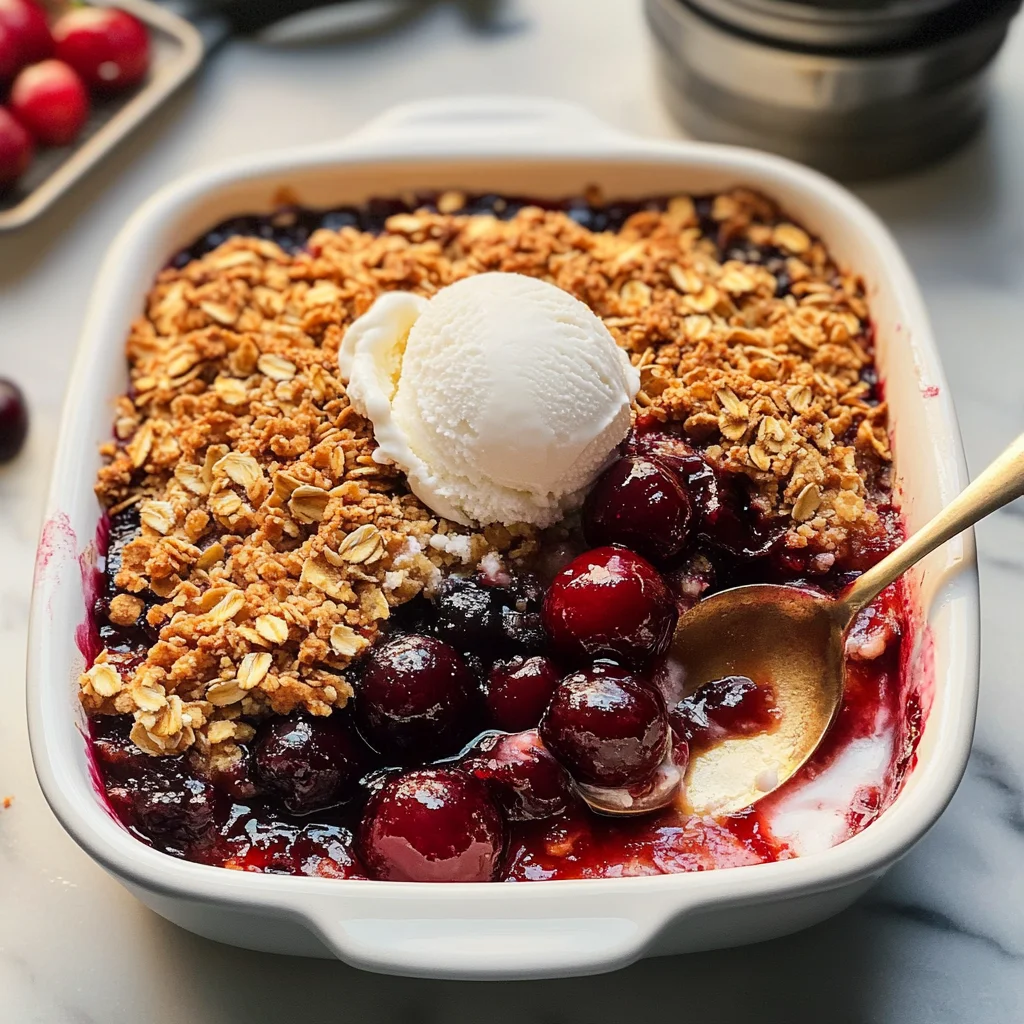
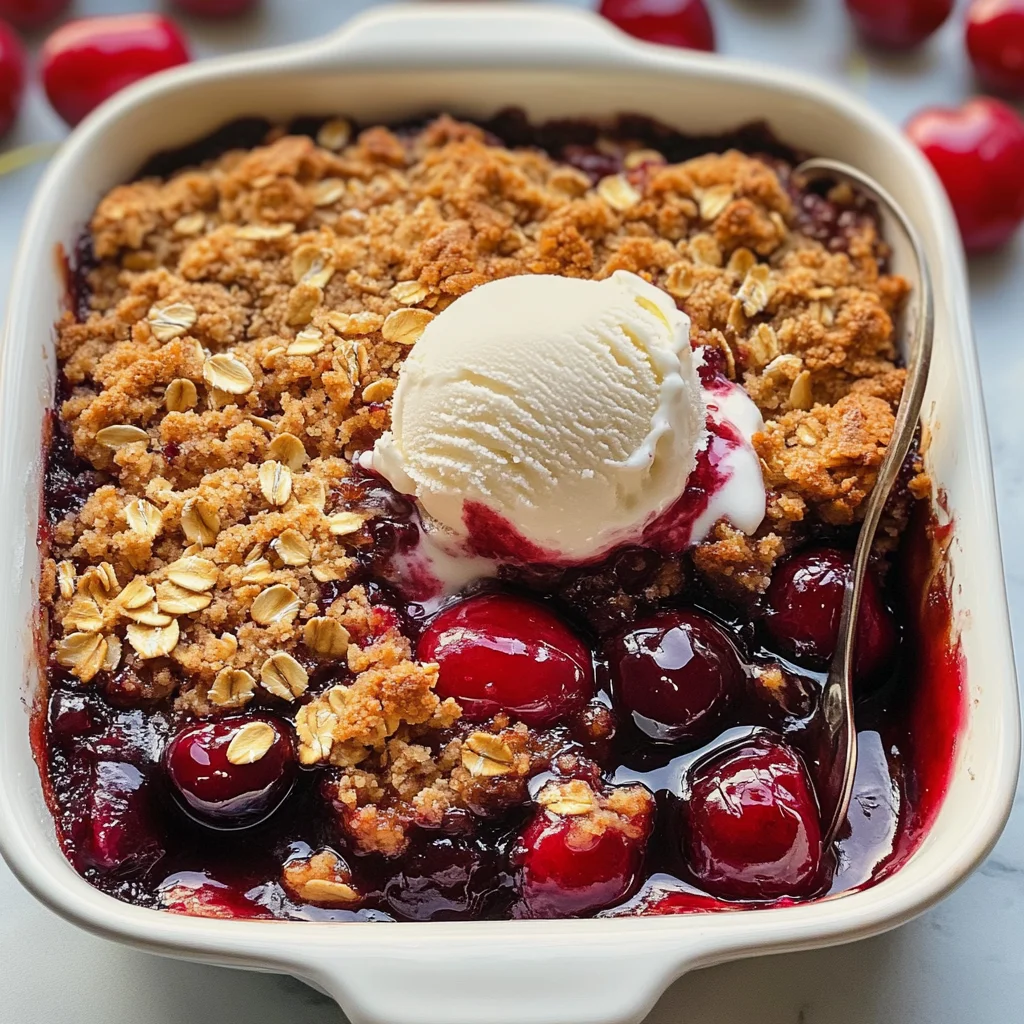
This quick and easy Cherry Crisp recipe brings together sweet, saucy cherries topped with a buttery oat mixture. It’s perfect for any occasion, whether you’re hosting a gathering or simply craving a warm dessert. The delightful combination of flavors and textures makes it a standout choice for dessert lovers everywhere!
Why You’ll Love This Recipe
- Effortless Preparation – With just a few simple steps, you can whip up this delicious dessert in no time.
- Perfectly Sweet and Tart – The balance of sweet cherries and the crunchy topping creates a delightful flavor profile.
- Versatile Serving Options – Enjoy it warm on its own or pair it with vanilla ice cream for an indulgent treat.
- Great for All Occasions – Ideal for family dinners, potlucks, or even a cozy night in.
- Easily Adaptable – Feel free to use canned cherry pie filling or fresh cherries based on your preference.
Tools and Preparation
Before diving into the recipe, gather your tools to ensure a smooth cooking experience.
Essential Tools and Equipment
- 9×9-inch baking pan
- Large mixing bowl
- Pastry cutter
- Silicone baking mat or parchment paper
Importance of Each Tool
- 9×9-inch baking pan – This size is perfect for baking the crisp evenly while allowing it to bubble beautifully.
- Large mixing bowl – Provides ample space to combine ingredients without making a mess.
- Pastry cutter – Ensures that the butter mixes well with the dry ingredients, creating that perfect crumbly texture.
Ingredients
Gather these ingredients to create your delicious Cherry Crisp:
For the Topping
- 1 cup flour
- 1 cup old-fashioned oats
- 1 cup light brown sugar (lightly packed)
- 1 teaspoon ground cinnamon
- 1/4 teaspoon ground nutmeg (optional)
- 1/2 teaspoon baking soda
- 1 teaspoon salt
- 12 tablespoons unsalted butter (cold, cubed)
For the Filling
- 2 (21-ounce) cans cherry pie filling (or fresh cherries)
How to Make Cherry Crisp
Step 1: Preheat the Oven
Preheat your oven to 350°F (175°C). Prepare your baking pan by lining it with parchment paper or using a silicone baking mat.
Step 2: Prepare the Topping Mixture
In a large mixing bowl, combine:
1. Flour
2. Old-fashioned oats
3. Light brown sugar
4. Ground cinnamon
5. Ground nutmeg (if using)
6. Baking soda
7. Salt
Add cubed butter to the dry mix. Use a pastry cutter and your fingertips to blend until it resembles coarse crumbs. If it gets too warm, chill the mixture in the refrigerator for about 20 minutes.
Step 3: Assemble the Cherry Filling
Scoop the cherry pie filling into your prepared 9×9-inch pan and spread it out evenly.
Step 4: Add the Topping
Sprinkle the oat topping evenly over the cherry filling without pressing down too hard. Place the dish on a lined sheet pan.
Step 5: Bake Your Crisp
Bake in your preheated oven for about 40–50 minutes or until the topping is golden brown and you see bubbles forming around the edges of the filling. If needed, cover with foil if browning too quickly.
Step 6: Cool and Serve
Allow your Cherry Crisp to cool on a rack for about 15–20 minutes before serving. Enjoy it warm alongside vanilla bean ice cream or fresh whipped cream for an unforgettable dessert experience!
How to Serve Cherry Crisp
Serving Cherry Crisp is a delightful experience that can be enhanced with various accompaniments. Whether you’re hosting a gathering or enjoying a quiet night in, these serving suggestions will take your dessert to the next level.
With Vanilla Ice Cream
- A classic pairing, vanilla ice cream complements the warm cherry filling perfectly, creating a delicious contrast of temperatures.
With Fresh Whipped Cream
- Light and fluffy whipped cream adds a creamy texture that balances the sweet tartness of the cherries beautifully.
With Yogurt
- For a healthier twist, serve with dollops of Greek yogurt. Its tanginess enhances the flavor while adding protein.
With Nuts
- Sprinkle chopped nuts like almonds or pecans on top for an added crunch that contrasts with the soft cherries and crisp topping.
As Breakfast
- Enjoy Cherry Crisp as a breakfast treat! Pair it with a side of yogurt or cottage cheese for a satisfying morning meal.
How to Perfect Cherry Crisp
Perfecting your Cherry Crisp can elevate your dessert game. Here are some helpful tips to ensure your dish turns out wonderfully every time.
- Use Fresh Cherries: If available, fresh cherries provide a brighter flavor compared to canned options. Just pit and slice them before use.
- Adjust Sweetness: Taste your cherry filling before baking; if it’s too tart, add a bit more sugar to balance the flavors.
- Monitor Baking Time: Keep an eye on your crisp while it bakes. Remove it from the oven once the topping is golden brown for optimal texture.
- Chill Butter: For a flakier topping, ensure your butter is cold and firm when mixing it into the dry ingredients.
- Serve Warm: Cherry Crisp is best enjoyed warm right out of the oven. Let it cool slightly before serving for perfect scoopability.
Best Side Dishes for Cherry Crisp
Pairing side dishes with Cherry Crisp can create a well-rounded meal. Here are some suggestions that complement this delicious dessert nicely.
- Vanilla Ice Cream: A timeless classic that enhances every bite with its creamy texture.
- Fresh Fruit Salad: A refreshing side that adds brightness and balances sweetness.
- Cheese Platter: A mix of cheeses can provide savory notes that contrast beautifully with the sweetness of the crisp.
- Cottage Cheese: This adds protein and creaminess, making for a satisfying combination.
- Granola: Sprinkle granola on top for added crunch and flavor; it pairs well with both warm and cold servings.
- Coffee or Tea: A warm beverage complements dessert nicely, enhancing flavors and providing warmth during colder months.
Common Mistakes to Avoid
Making a Cherry Crisp can be simple, but there are common pitfalls that can affect your dessert. Here are some mistakes to avoid:
-
Using warm butter: Warm butter will not create the desired crumbly texture for your topping. Always use cold, cubed butter for the best results.
-
Overmixing the topping: Mixing too much can lead to a dense topping instead of a light and crispy one. Blend until just combined for perfect crunch.
-
Ignoring baking times: Every oven is different. Keep an eye on your Cherry Crisp, as baking times may vary. Look for a golden brown topping and bubbling filling.
-
Not letting it cool: Serving immediately can make the filling runny. Allowing it to cool for 15–20 minutes helps set everything nicely.
-
Skipping the salt: Salt enhances flavors, even in desserts. Don’t forget to add it to your dry ingredients for a balanced taste.
Storage & Reheating Instructions
Refrigerator Storage
- Store in an airtight container.
- It lasts up to 3 days in the refrigerator.
Freezing Cherry Crisp
- Wrap tightly with plastic wrap or aluminum foil.
- It can be frozen for up to 3 months. Thaw in the refrigerator before reheating.
Reheating Cherry Crisp
- Oven: Preheat to 350°F, cover with foil, and bake for about 20 minutes until heated through.
- Microwave: Heat individual portions for about 30 seconds at a time until warm.
- Stovetop: Warm in a skillet over low heat, stirring occasionally until heated through.
Frequently Asked Questions
Here are some common questions about making Cherry Crisp:
What is Cherry Crisp?
Cherry Crisp is a dessert featuring sweet cherries topped with a buttery oat mixture that crisps up during baking.
Can I use fresh cherries for this recipe?
Yes! Fresh cherries work wonderfully. Just pit and slice them before using them in place of canned pie filling.
How do I make my Cherry Crisp even sweeter?
You can add extra sugar or sweeteners to the cherry filling if you prefer it sweeter. Adjust according to your taste!
Can I use other fruits besides cherries?
Absolutely! This crisp topping works well with other fruits like blueberries, peaches, or apples for delicious variations.
How should I serve Cherry Crisp?
Serve warm with vanilla bean ice cream or fresh whipped cream on top for an indulgent treat!
Final Thoughts
This Cherry Crisp recipe is not only easy to make but also incredibly delicious, making it the perfect dessert for any occasion. With its saucy cherries and crunchy topping, you can easily customize it by adding different fruits or spices. Give it a try, and enjoy every bite!
Cherry Crisp
- Total Time: 1 hour
- Yield: Serves 8
Description
Indulge in the delightful experience of homemade Cherry Crisp, a warm dessert that showcases sweet cherries enveloped in a golden, buttery oat topping. This quick and easy recipe is perfect for gatherings or cozy nights at home, delivering a satisfying balance of flavors and textures. Serve it warm alongside vanilla ice cream or fresh whipped cream for an extra touch of indulgence. With its adaptable nature, you can use fresh or canned cherries, making it a versatile treat for any occasion.
Ingredients
- 1 cup flour
- 1 cup old-fashioned oats
- 1 cup light brown sugar (lightly packed)
- 1 teaspoon ground cinnamon
- 1/4 teaspoon ground nutmeg (optional)
- 1/2 teaspoon baking soda
- 1 teaspoon salt
- 12 tablespoons unsalted butter (cold, cubed)
- 2 (21-ounce) cans cherry pie filling (or fresh cherries)
Instructions
- Preheat your oven to 350°F (175°C) and prepare a 9×9-inch baking pan by lining it with parchment paper.
- In a large bowl, mix flour, oats, brown sugar, cinnamon, baking soda, and salt. Add cold butter and blend until crumbly.
- Spread cherry filling evenly in the prepared pan and sprinkle the oat mixture on top.
- Bake for 40–50 minutes until the topping is golden brown and bubbly around the edges.
- Let cool for 15–20 minutes before serving warm with ice cream or whipped cream.
- Prep Time: 15 minutes
- Cook Time: 45 minutes
- Category: Dessert
- Method: Baking
- Cuisine: American
Nutrition
- Serving Size: 1 serving
- Calories: 290
- Sugar: 20g
- Sodium: 150mg
- Fat: 14g
- Saturated Fat: 8g
- Unsaturated Fat: 5g
- Trans Fat: 0g
- Carbohydrates: 39g
- Fiber: 3g
- Protein: 3g
- Cholesterol: 30mg
Keywords: For fresher flavor, use pitted fresh cherries instead of canned. Adjust sweetness by tasting the cherry filling before baking. Chill the butter for a flakier topping.