
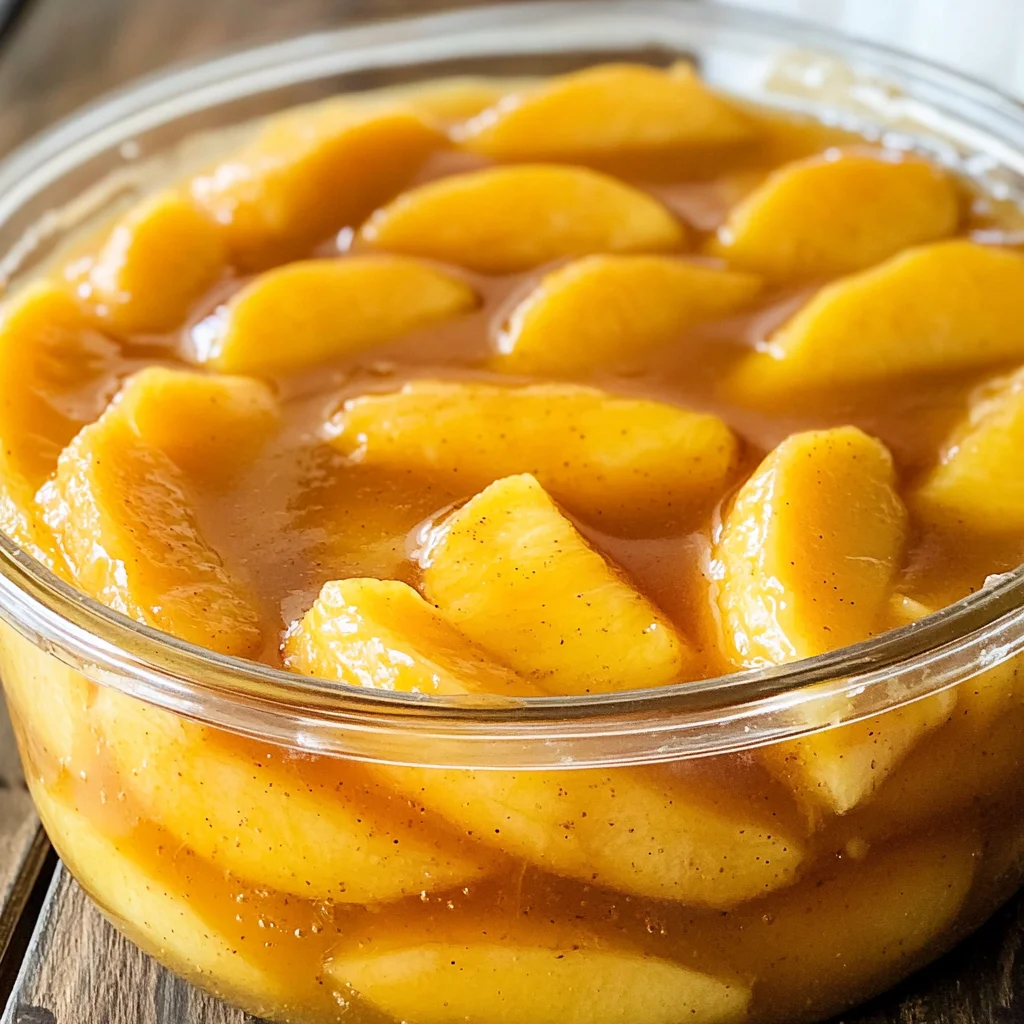
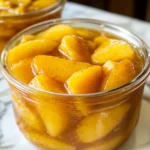
This homemade canned peach pie filling is a delightful way to preserve the sweetness of summer peaches for your favorite desserts. With its thick, silky texture and warm spices, this filling can elevate pies, crisps, or cobblers throughout the year. Whether you’re hosting a holiday gathering or simply craving a slice of peach pie, this recipe ensures you have a jar of deliciousness ready to use.
Why You’ll Love This Recipe
- Easy to Make: With simple steps and straightforward ingredients, this recipe is perfect for both beginners and experienced canners.
- Versatile Use: Not just for pies, this filling works beautifully in cobblers, crisps, and even as a topping for yogurt or pancakes.
- Year-Round Enjoyment: Capture the taste of summer and enjoy it during colder months with this preserved peach filling.
- Homemade Goodness: Skip store-bought options filled with preservatives; you’ll know exactly what’s in your jar.
- Perfect for Gifting: Share a taste of summer with friends and family by giving jars of this delicious filling as gifts.
Tools and Preparation
Before diving into the recipe, gather your tools to ensure a smooth canning process. Having everything on hand will make your experience enjoyable.
Essential Tools and Equipment
- Canning jars (quart-size)
- Boiling water bath canner
- Large pot
- Jar lifter
- Ladle
- Funnel
Importance of Each Tool
- Canning jars: These are essential for safely storing your homemade canned peach pie filling while ensuring freshness.
- Boiling water bath canner: This tool helps process jars at the right temperature to eliminate bacteria and seal them properly.
- Ladle: A ladle makes it easy to transfer hot peach filling into jars without making a mess.
- Jar lifter: This tool is crucial for safely removing hot jars from boiling water without burning yourself.
Ingredients
This homemade canned peach pie filling is a sweet, spiced preserve made with fresh peaches and a thick, silky base—perfect for baking pies, crisps, or cobblers year-round. With this easy water bath canning method, you can enjoy the flavor of summer peaches even in winter.
Ingredients (for 4–5 quarts)
6 quarts fresh peaches, peeled, pitted, and sliced (about 24–30 medium peaches)
7 cups granulated sugar
2 cups cold water
1¾ cups clear jel (cook-type, not instant)
5¼ cups peach juice or water (from peaches or bottled)
½ cup bottled lemon juice
1½ teaspoons ground cinnamon (optional)
½ teaspoon ground nutmeg (optional)
How to Make Homemade Canned Peach Pie Filling
Step 1: Prepare Jars
Wash and sterilize 4–5 quart-size canning jars. Keep them warm until you’re ready to fill them with the delicious peach mixture.
Step 2: Prepare Peaches
Blanch peaches in boiling water for 30–60 seconds. Then transfer them to an ice bath. Peel, pit, and slice the peaches. To prevent browning during preparation, soak the slices in water mixed with lemon juice or ascorbic acid.
Step 3: Blanch Slices
Boil sliced peaches in batches for about 1 minute. Drain the slices well and keep them warm while preparing the filling base.
Step 4: Make Filling Base
In a large pot, whisk together the sugar and clear jel. Gradually stir in 2 cups of cold water along with 5¼ cups of peach juice (or plain water). Cook over medium-high heat while stirring constantly until it thickens and bubbles start to appear.
Step 5: Add Lemon Juice and Spices
Add the bottled lemon juice along with cinnamon and nutmeg (if desired) into the thickened mixture. Allow it to boil for one additional minute.
Step 6: Add Peaches
Gently fold in the warm peach slices into the mixture. Bring everything back to a boil while stirring gently to combine.
Step 7: Fill Jars
Ladle the hot peach filling into prepared jars while leaving about one inch of headspace at the top. Remove any air bubbles trapped inside by running a spatula around the edges. Wipe down the rims of each jar before sealing them with lids and bands.
Step 8: Process Jars
Place filled jars into your boiling water bath canner. Process them for about 30 minutes but adjust accordingly if you’re at higher altitudes.
Step 9: Cool and Store
Once processing is complete, let jars sit undisturbed for anywhere from 12 to 24 hours. After that time has passed, check that all seals are secure before labeling each jar. Store them in a cool dark place where they will last up to one year.
Now that you’ve mastered making homemade canned peach pie filling, you’ll always have delicious fruit preserves on hand!
How to Serve Homemade Canned Peach Pie Filling
Homemade canned peach pie filling is versatile and can be enjoyed in multiple ways. The sweet, spiced flavor adds a delightful touch to various desserts and breakfast items. Here are some delicious serving suggestions.
Top on Ice Cream
- Scoop vanilla or cinnamon ice cream and drizzle the warm peach pie filling on top for a comforting dessert.
Fill a Tart
- Use the filling to create a peach tart. Just spread it in a pre-baked tart shell and serve chilled.
Layer in Parfaits
- Combine the peach filling with yogurt and granola for a refreshing parfait that’s perfect for breakfast or dessert.
Spread on Toast
- Spread the warm filling on toasted bread or biscuits for a simple yet scrumptious treat.
Mix into Pancake Batter
- Fold some of the peach pie filling into pancake batter before cooking for a fruity twist on your breakfast favorite.
How to Perfect Homemade Canned Peach Pie Filling
Creating the perfect homemade canned peach pie filling requires attention to detail. Follow these tips for the best results.
- Use fresh peaches: Choose ripe, firm peaches for optimal flavor and texture in your filling.
- Maintain acidity: Always use bottled lemon juice to ensure proper acidity, which is crucial for safe canning.
- Measure accurately: Use precise amounts of sugar and clear jel to achieve the desired thickness of your filling.
- Avoid air bubbles: Remove air bubbles in jars before sealing to prevent spoilage during storage.
- Adjust processing time: If you’re at high altitude, make sure to adjust your processing time accordingly to ensure safety.
- Label jars clearly: Always label your jars with the date and contents to keep track of freshness.
Best Side Dishes for Homemade Canned Peach Pie Filling
Homemade canned peach pie filling pairs well with various side dishes that complement its sweetness. Here are some great options to consider.
- Savory Biscuits: Fluffy buttermilk biscuits that provide a rich contrast to the sweet peach filling.
- Greek Yogurt: Creamy Greek yogurt adds protein and balances the sweetness when served alongside.
- Pork Chops: Grilled or baked pork chops topped with peach glaze enhance both flavors beautifully.
- Cinnamon Oatmeal: A warm bowl of cinnamon oatmeal enriched with spoonfuls of peach pie filling makes for a hearty breakfast.
- Cheese Platter: Pair this sweet filling with sharp cheeses like aged cheddar or blue cheese for an elegant appetizer.
- Roasted Vegetables: Caramelized roasted vegetables add depth and balance against the sweetness of the peaches.
- Crumbly Cornbread: Sweet cornbread serves as a delightful companion, soaking up any extra juices from the filling.
- Cream Cheese Frosting: Use as a topping on cupcakes or cakes frosted with cream cheese for an indulgent dessert option.
Common Mistakes to Avoid
When making homemade canned peach pie filling, it’s easy to make some common mistakes. Here are a few to watch for:
- Using the wrong type of Clear Jel: Always use cook-type Clear Jel. Instant Clear Jel will not thicken properly when canned and could ruin your filling.
- Skipping sterilization: Failing to sterilize jars can lead to spoilage. Always wash and warm your jars before filling them.
- Not adjusting for altitude: If you live at a higher altitude, processing times may vary. Make sure to adjust according to local guidelines for safe canning.
- Neglecting headspace: Leaving too little headspace can result in overflow during processing. Aim for 1 inch of headspace in your jars.
- Ignoring acidity levels: Using fresh lemon juice instead of bottled can affect acidity and safety. Stick with bottled lemon juice for consistent results.
- Overcooking peaches: Cooking peaches too long before filling can make them mushy. Keep the blanching time short to maintain texture.

Storage & Reheating Instructions
Refrigerator Storage
- Store opened jars in the refrigerator.
- Use within 1–2 weeks for best quality.
Freezing Homemade Canned Peach Pie Filling
- Transfer filling to freezer-safe containers or bags.
- Freeze for up to 1 year; label with the date.
Reheating Homemade Canned Peach Pie Filling
- Oven: Preheat oven to 350°F (175°C) and bake until heated through, about 20 minutes.
- Microwave: Heat in microwave-safe dish on medium power, stirring occasionally until warm.
- Stovetop: Heat over medium-low heat in a saucepan, stirring gently until warmed.
Frequently Asked Questions
Here are some commonly asked questions about homemade canned peach pie filling.
What is Homemade Canned Peach Pie Filling?
Homemade canned peach pie filling is a sweet preserve made from fresh peaches, sugar, and spices that you can use in pies or desserts.
How long does homemade canned peach pie filling last?
When stored properly, homemade canned peach pie filling lasts up to one year. Check seals regularly if opened.
Can I use frozen peaches for this recipe?
Yes, you can use frozen peaches as long as they are thawed and drained well before adding them to the filling.
Can I substitute other fruits?
Absolutely! This method works well with other fruits like cherries or blueberries. Just adjust sugar levels based on the fruit’s sweetness.
What do I do if my jars don’t seal?
If your jars don’t seal properly, refrigerate them and use within a week. You can try reprocessing them or transferring the contents into new jars.
Final Thoughts
This homemade canned peach pie filling is both delicious and versatile. It’s perfect for pies, crisps, or cobblers any time of year! Feel free to customize by adding different spices or using various fruits for unique flavors. Enjoy preserving the taste of summer!
Homemade Canned Peach Pie Filling
- Total Time: 1 hour 15 minutes
- Yield: Approximately 4–5 quart-sized jars 1x
Description
Homemade canned peach pie filling is a delightful way to capture the essence of summer peaches in a jar. This sweet, spiced preserve boasts a thick, silky texture that elevates pies, crisps, and cobblers throughout the year. With just a few simple ingredients and straightforward steps, you can create a delicious filling that’s perfect for any occasion—whether you’re hosting a holiday gathering or satisfying a late-night craving. Enjoy the warmth of spices and fresh peaches, knowing exactly what goes into your homemade goodness. Perfect for gifting, this recipe ensures you’ll always have a taste of summer ready to share with friends and family.
Ingredients
- 6 quarts fresh peaches (peeled, pitted, and sliced)
- 7 cups granulated sugar
- 2 cups cold water
- 1¾ cups clear jel (cook-type)
- 5¼ cups peach juice or water
- ½ cup bottled lemon juice
- 1½ teaspoons ground cinnamon (optional)
- ½ teaspoon ground nutmeg (optional)
Instructions
- Sterilize 4–5 quart-size canning jars and keep them warm.
- Blanch peaches in boiling water for 30–60 seconds, then transfer to an ice bath. Peel, pit, and slice the peaches.
- Boil sliced peaches in batches for about 1 minute; drain well.
- In a large pot, whisk together sugar and clear jel; stir in cold water and peach juice. Cook over medium-high heat until thickened.
- Add lemon juice and optional spices; boil for an additional minute.
- Gently fold in warm peach slices, bring to a boil while stirring gently.
- Ladle hot filling into prepared jars with about one inch of headspace; remove air bubbles and seal jars with lids.
- Process jars in boiling water bath for about 30 minutes (adjust for altitude).
- Allow jars to cool undisturbed for 12–24 hours before checking seals.
- Prep Time: 30 minutes
- Cook Time: 45 minutes
- Category: Dessert
- Method: Canning
- Cuisine: American
Nutrition
- Serving Size: 1/4 cup (60g)
- Calories: 120
- Sugar: 28g
- Sodium: 0mg
- Fat: 0g
- Saturated Fat: 0g
- Unsaturated Fat: 0g
- Trans Fat: 0g
- Carbohydrates: 31g
- Fiber: <1g
- Protein: <1g
- Cholesterol: 0mg
Keywords: For best flavor, use ripe but firm peaches. Always use bottled lemon juice for consistency in acidity levels crucial for safe canning. Adjust processing time if you live at high altitude.